


The dark days of winter are upon us. As a gardener, this is the time of year we pull out the seed catalogs and start planning for next year.
If you’re like me, you may already have been collecting and buying seeds throughout the summer and fall. Now is the time to prepare for winter sowing.
I first tried the winter sowing method last winter. It appealed to me because I can be a lazy gardener and I liked the ‘set it and forget it nature’ of this method of seed starting.
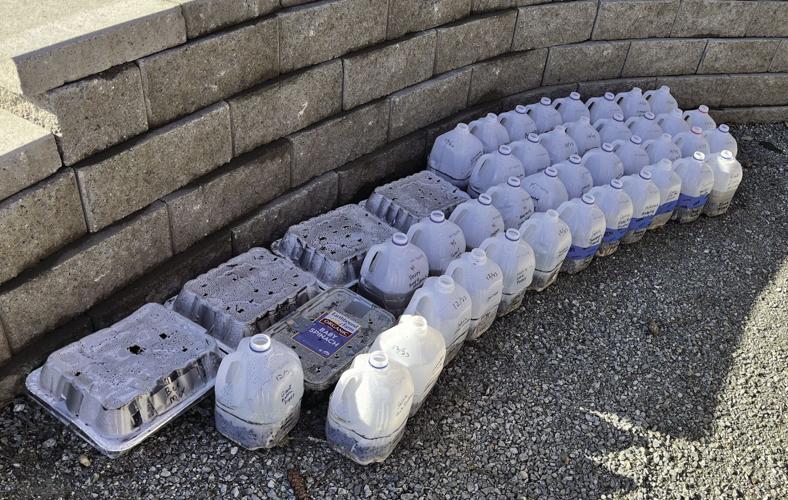
I began with a few gallon jugs and before I knew it the number had blossomed to 40! I give full credit for this technique to Trudi Davidoff, who pioneered the method in upstate New York over 20 years ago.
The advantages of
winter sowing as
compared to
other methods
• No lights needed
• No trays, tables, or shelves
• Minimal watering is required
• Upcycling of containers
• Seedlings are weed free
• Minimizes the risk of not dampening or hardening off well enough because seeds are stratified and germinate in their ‘milk jug’ environments naturally.
The process is so easy — let me share it with you:
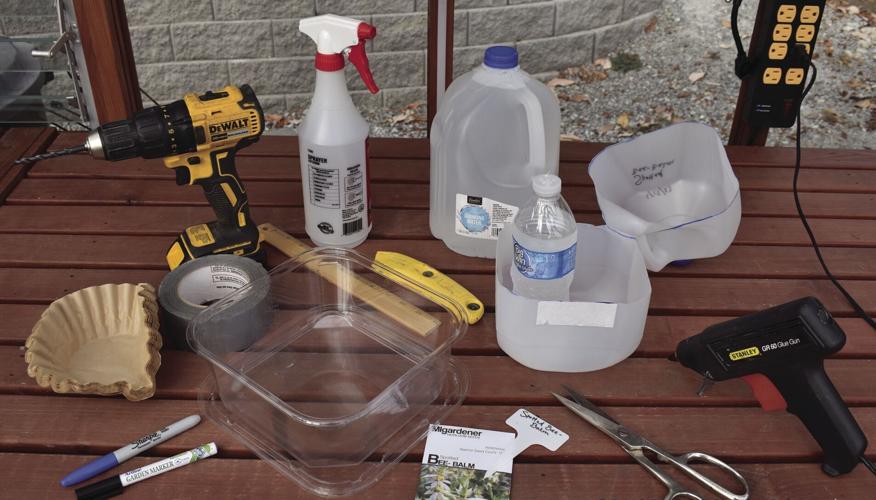
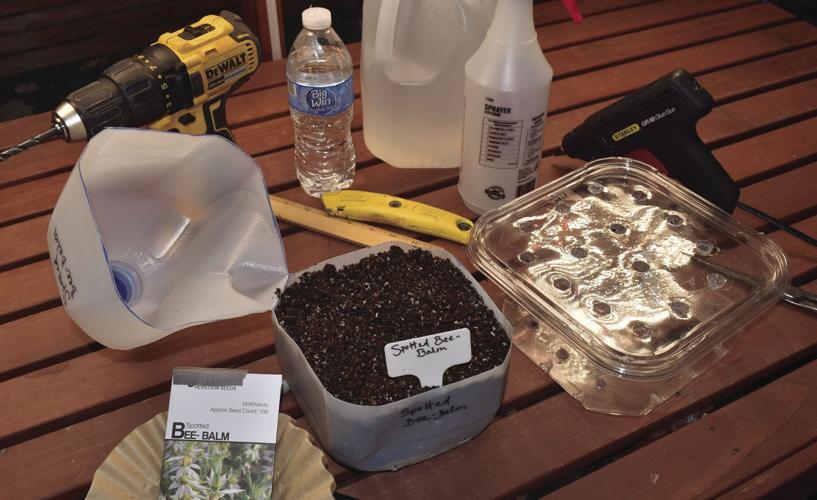
Materials you will need
• Clean translucent milk or juice jugs without lids.
• Other large, clean, rigid clear plastic containers like those used for roasted chicken, or salad greens with lids,
• Utility knife or scissors.
• Potting soil without moisture control or fertilizer,
• Poly or duct tape.
• Plant markers.
• UV-resistant, waterproof marker.
• Coffee filters.
• Seeds.
• Spray bottle and water bottle with holes in cap (for watering).
Steps for winter sowing
1. Turn the jug/container bottom up and cut or burn multiple small drainage holes in the bottom. I recommend adding multiple bottom-side drainage holes because in our climate having only one center drainage hole didn’t work well. To do this, I use an old glue gun, making sure to have good ventilation when burning plastic. A utility knife or drill will also work for creating drainage holes.
2. Use a ruler to measure and mark a cut line 4 inches from the bottom of the jug. Mark the line with a marker all around the jug.
3. Using a utility scissors or knife, carefully cut the jug along the line you have measured, leaving a hinge at the back of the jug under the handle so that the top portion will flip open while still attached.
4. Place a coffee filter in the bottom of the jug (to keep the slugs out and hold soil in) and add pre-moistened potting soil to a level just below the hinge line.
5. Label the container with the plant name and date in three places using a no-fade, UV, water-resistant marker. Label the bottom of the jug, the top of the jug, and the plant marker in the soil. Household Sharpie-type markers are not recommended because the information will fade after months of being outside.
6. Plant your seeds to the recommended depth on the packaging and moisten them with water from a spray bottle.
7. Tape the jug closed using clear poly or duct tape around the circumference. Place jugs in the sun, a southeast location is best. Snow or rain will do some of your watering for you, but make sure your spot has good drainage, so they are not sitting in water.
8. Check for moisture in the jugs at least once a week. Peek inside the jug, looking to see if the soil looks moist. Another way to check for adequate moisture is noticeable condensation on the inside hips of the jug. In the early days, I only watered about once a month. If they need watering, use the water bottle you’ve prepared with the holes in the lid, squirting a little water on to wet the soil.
9. As the seedlings germinate and grow and the weather warms up, open the containers during the day and close them at night.
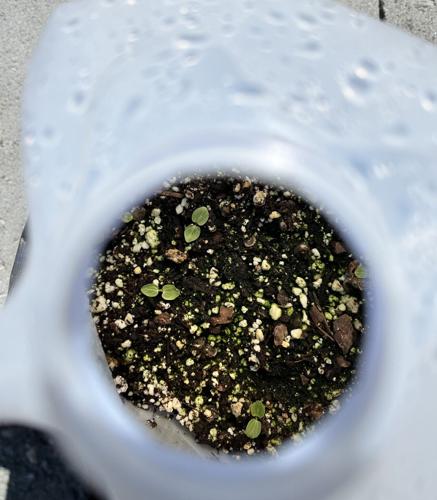
10. When seedlings have pushed out their true leaves after the initial cotyledons, and the weather has warmed as needed, transplant them into the ground or a 4-inch pot. You can pull out 2-3 seedlings at a time using the taffy method or use the brownie method and cut them into blocks of seedlings for planting.
What to plant and when December through February: For our zones, this would start around Dec. 21, on Winter Solstice, when the daylight is at its shortest.
Examples of hardy annuals and perennials that can be started in winter include coneflower, columbine, sweet pea, lupine, native grasses, lavender, hollyhock, spinach, kale, thyme, oregano and parsley.
March through April: Tender annuals and vegetables can be started. Examples include Cosmos, Zinnia, marigold, Alyssum, Lobelia, Impatiens, beets, broccoli, basil, cilantro, and lettuce. Using this method, wait until April to start tomatoes, peppers, eggplant, melons, squash, and pumpkins.
When I started, I originally focused on starting perennials. Later, I sowed annuals and other seeds I had collected around my yard or traded with friends, but be careful not to plant late tender annuals like cosmos and zinnias too early.
Pay close attention to the general planting dates I’ve outlined above. Despite planting some of these tender annuals too early, I still had a nearly 90% germination rate overall.
From last year’s trials, I also learned green algae can grow on the surface of the potting soil. This year I will add more drainage holes and use potting soil that does not contain moisture control products since PNW winters are typically ‘a bit moister’ than the winters in the eastern US where this method originated.
Another important reminder, not all seeds will germinate by May. Don’t be disappointed, be patient. Some seeds like columbine, milkweed, and others can take months or longer so don’t throw those milk jugs out too quickly — you may be surprised by what germinates late. As the days and nights grow warmer and the plants get bigger, you’ll open up the jugs.
I hope you enjoy this seed starting technique as much as I do and share your bounty with family, friends and neighbors. Once you get the hang of it you will have plenty of plant babies to gift. Cheers and happy gardening!
Starting in January 2023, you’ll find the Ask a Master Gardener bi-monthly articles posted on our website: www.skagitmg.org. We invite you to visit and/or subscribe to our regular feature articles written by locally certified WSU Extension Master Gardeners.

(0) comments
Welcome to the discussion.
Log In